A Royal Veggie Affair For Lavish Dinner Nights: Paneer Vegetable Biryani Magic
June 26, 2026
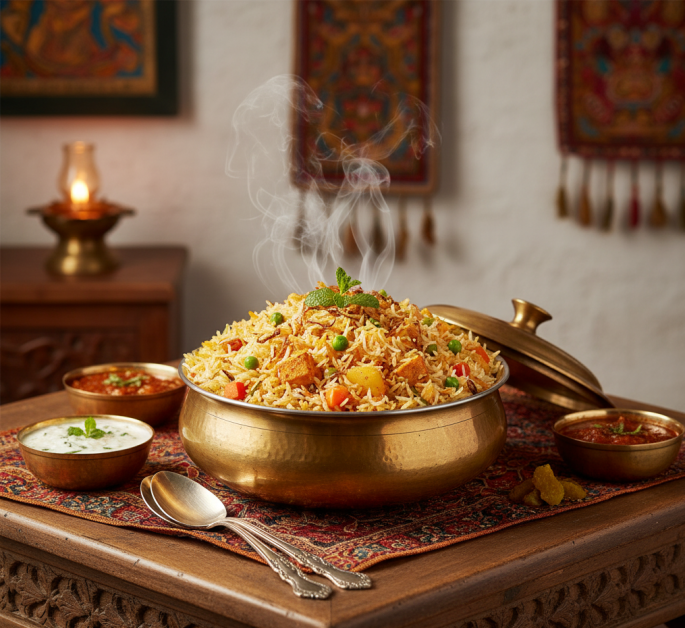
When we talk of Veg-biryani, many just instantly say it's not biryani, it's pulav; people propagate that there is no such thing as vegetable biryani. Well, when it's cooking veg, I like to prove to people that veg food should not be underestimated. Though non-veg biryani is famous and tasty, after turning complete vegetarian, I learnt many dishes, and each was comforting, wholesome, and aromatic. And if it is about Paneer Vegetable Biryani, it's an amalgamation of spices, all indulging in Paneer, flavourful rice, and varied veggies, enhancing your taste buds.
So, for all the vegetarians who have been listening, it's not possible to have a veg-biryani. Let's layer love and spices for luxury dinner nights packed with flavors, and learn how to make Healthy Paneer Vegetable Biryani at home.
Layers of Spice Aroma and Comfort: Authentic Paneer Vegetable Biryani Recipe
Ingredients: Serves: 4–5
For the Rice:
Basmati rice – 2 cups (aged, long-grain preferred)
Water – 6–7 cups
Bay leaf – 1
Green cardamoms – 3
Cloves – 3
Cinnamon stick – 1 small
Salt – 1 tsp
Oil or ghee – 1 tsp
For the Paneer & Vegetables:
Paneer – 200 g (cut into medium cubes)
Mixed vegetables – 2 cups (carrots, beans, peas, potatoes, cauliflower)
Oil – 2 tbsp
Salt – to taste
Red chili powder – ½ tsp
Turmeric – ¼ tsp
For the Biryani Masala Base:
Ghee – 3 tbsp
Onions – 2 large (thinly sliced, fried till golden)
Ginger-garlic paste – 1½ tbsp
Tomatoes – 2 medium (chopped)
Green chilies – 2 slit
Whisked curd (yogurt) – ½ cup
Biryani masala powder – 1 tbsp
Coriander powder – 1 tsp
Garam masala – ½ tsp
Fresh coriander leaves – ¼ cup (chopped)
Fresh mint leaves – ¼ cup (chopped)
For the Final Layering:
Saffron – a few strands soaked in ¼ cup warm milk
Fried onions (birista) – 2 tbsp
Ghee – 2 tbsp
Fresh mint & coriander – handful each
Optional: 1 tsp rose water or kewra water for aroma
Method
First, start by preparing the rice.
Use aged basmati rice for the best aroma and long grains. Wash basmati rice 3–4 times until the water runs clear. Soak the rice for 30 minutes, then drain.
While the rice is being soaked, start preparing with other parts of the Biryani.
To complete the rice after 30 min boil water with whole spices (bay leaf, cardamom, cloves, cinnamon) and salt. Add soaked rice and cook until it’s 70–80% done (grains firm but not mushy).
Drain immediately and spread on a tray to cool. This keeps grains separate. I generally have my other preparation done until the rice is half-cooked, so I directly spread it over layering, avoiding the hassle of keeping them from sticking
Until your rice is soaking, prepare Paneer & Vegetables.
Start by lightly frying paneer cubes in oil until golden; remove and set aside. I add in some crushed kasuri methi and light masala powder to the paneer for added taste.
In the same pan, sauté chopped vegetables with salt, chili powder, and turmeric for 5–7 minutes till semi-cooked. Keep aside for layering.
Then start making the Biryani Masala Base.
In a heavy-bottomed biryani pot or handi, heat ghee. Add sliced onions and fry till golden brown; remove half for garnish. The fried onions (birista) are key to authentic Hyderabadi-style flavor. Add ginger-garlic paste, and sauté until the raw smell disappears. Add chopped tomatoes and green chilies; cook till tomatoes turn soft and oily. Stir in biryani masala, coriander powder, and garam masala.
Lower the flame, add whisked curd, and mix well to create a rich masala base. Add sautéed vegetables and paneer. Mix gently so the paneer doesn’t break. Sprinkle chopped mint and coriander. Let it cook for 5 minutes till the masala thickens.
What I prefer for masala base is to create a paste separately of fried onion, tomatoes, garlic, ginger, some pepper, and fennel seed (sauf). This is my favorite paste I keep handy to make any Paneer sabzi base and use the same for biryani. This adds another layer of flavor.
Layering the Biryani (Dum Process).
Now, layering the Biryani is an art to bake it to perfection. I, being lazy, always skip this process and just add rice on top of the masala sabzi I have created for Biryani and top it with fried paneer, barista, coriander leaves, and saffron milk. But remember, let them be in that layer, the sabzi at base and the rice on top with additional topping, do not mix this keeps the biryani texture distinct
But for the traditional process, you would need a heavy-bottomed handi or deep pan to start layering: first, spread half of the cooked rice over the paneer-veg masala. Then, drizzle saffron milk, ghee, fried onions, mint, and coriander. Repeat with the remaining rice and toppings. Add a few drops of rose/kewra water (optional) for a royal aroma. Then, finally seal the handi with dough or cover tightly with a lid to trap steam.
Dum Cooking (Steaming)
Now for dum cooking, you can just traditionally place the handi on a tawa over a low flame for 20–25 minutes. This ensures even heat without burning the bottom.
Or you have an option to make it in the oven. Preheat oven to 180°C (350°F). Bake covered handi for 25 minutes.
Let it rest for 10 minutes before opening to allow the flavors to settle. Gently fluff the biryani from the sides to mix layers without breaking rice. Serve hot with raita, salad, and a dash of lime on the side.
That was for the royal spread of Biryani, and you are set to serve a feast with aromas. Even though you are a vegetarian, you deserve the taste of life, so treat yourself with this delightful dish. Enjoy the tasty indulgent, and until next time, keep cooking up a storm.
FAQs:
1. What makes Paneer Vegetable Biryani unique from other biryanis?
Ans) Paneer Vegetable Biryani stands out for its perfect blend of soft paneer cubes, fresh seasonal veggies, and fragrant basmati rice layered with saffron and aromatic spices. Unlike meat biryanis, it’s lighter, vegetarian-friendly, yet equally rich in flavor — offering a royal taste without being too heavy.
2. How do you prevent paneer from becoming rubbery in biryani?
Ans) The secret is to lightly pan-fry or soak paneer in warm water before layering it in the biryani. Avoid overcooking it during the dum (steam) process. This keeps the paneer soft, moist, and perfectly infused with masala flavors.
3. Can I make Paneer Vegetable Biryani without layering?
Ans) Yes! You can make a one-pot version by cooking the rice and vegetables together with the masala. While it’s quicker, the traditional layered biryani (with rice and gravy in alternate layers) gives a deeper aroma and richer, more authentic flavor.
4. What are the best side dishes to serve with Paneer Vegetable Biryani?
Ans) Pair it with boondi raita, mint yogurt dip, or mirchi ka salan for a complete meal. You can also serve it with papad, onion salad, or pickle for an added crunch and tangy balance.
5. How can I make my Paneer Vegetable Biryani more aromatic?
Ans) Use aged basmati rice, freshly ground garam masala, and saffron soaked in warm milk for a rich fragrance. A drizzle of ghee and a few fried onions (birista) on top before sealing the pot adds that royal, restaurant-style aroma.
– P. Manika (Performist Content Writer)
